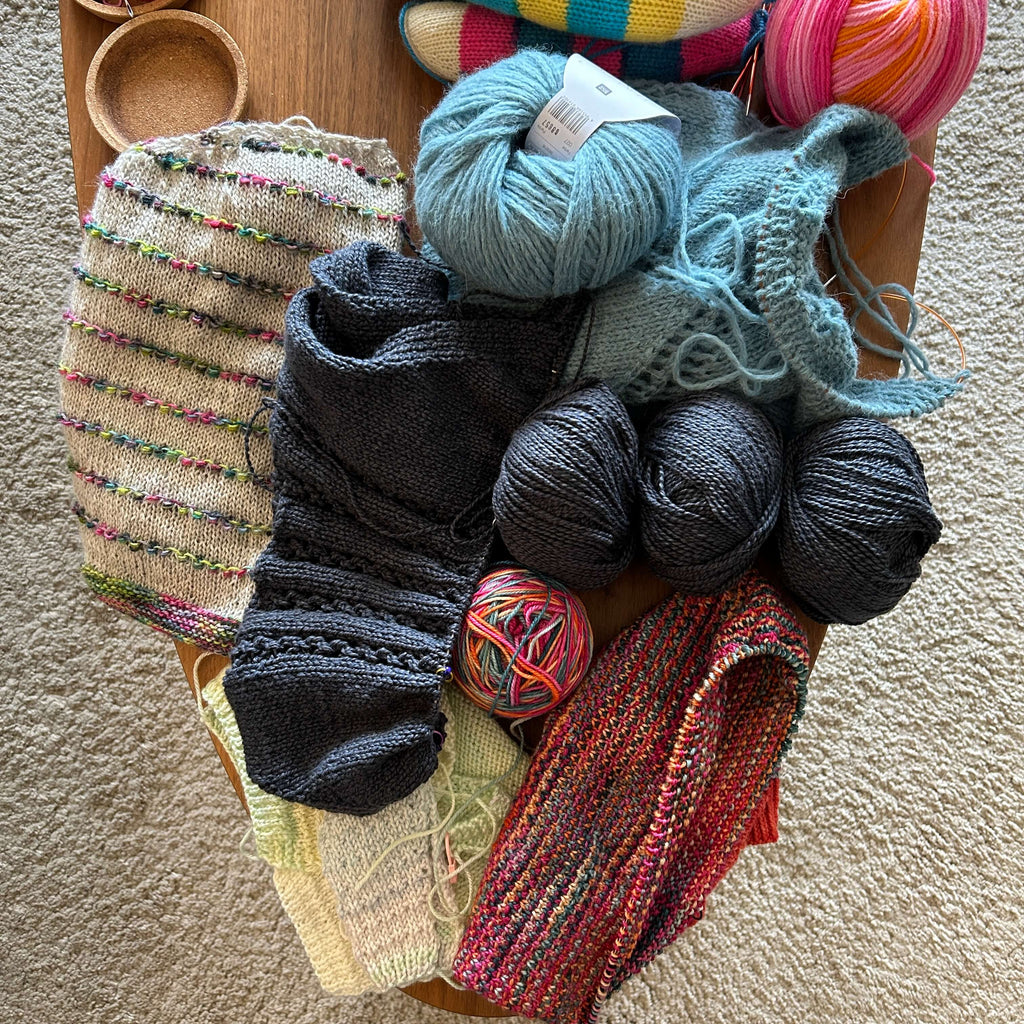
A monthly update of all the projects piling up on and under my coffee table. You can read last month's update here and all previous months here.
I ended the January round up with these plans...
Cast of Simple Fluffy loop and write up the (very) simple pattern.
Make at least 3 more fish.
Work on Student Vest and finish another ball of yarn.
Start the Loops shawl... again.
Start and finish Crochet Cushion v. 2.
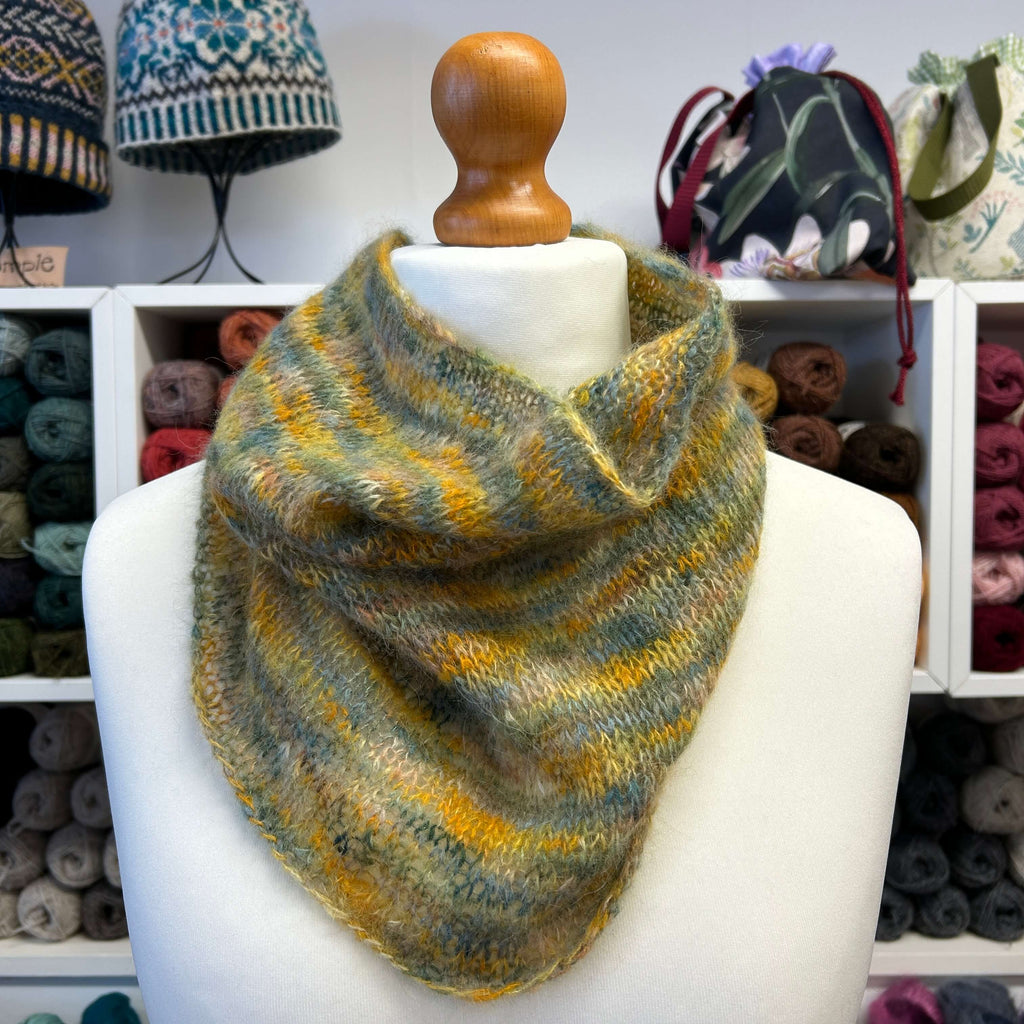
The Simple Fluffy Loop is knitted in Nervus Fibre Suri Silk. A hand dyed blend of alpaca and silk.
(For those that are sensitive to mohair silk I'd recommend trying this alpaca silk. You may find it less annoying.)
The yarn is super super soft and squishy. On the hank it's soft but when it's knitted it's another level of squishy. I'm also surprised at how the colours came together. It almost looks like camouflage.
I've still to write up the pattern more formally but it's essentially...
Use a 5mm needle and loosely cast on 100 stitches. Just knit every stitch on every round. Loosely cast off when you get to a height you like.
I cast off when it was 35cm tall and I've used half the yarn (it comes in 50g hanks). This leaves 25g for another cowl, like our Mohair Cowl.
Although I am thinking of combining it with a shade of Socks Yeah 4ply and doing something entirely different.
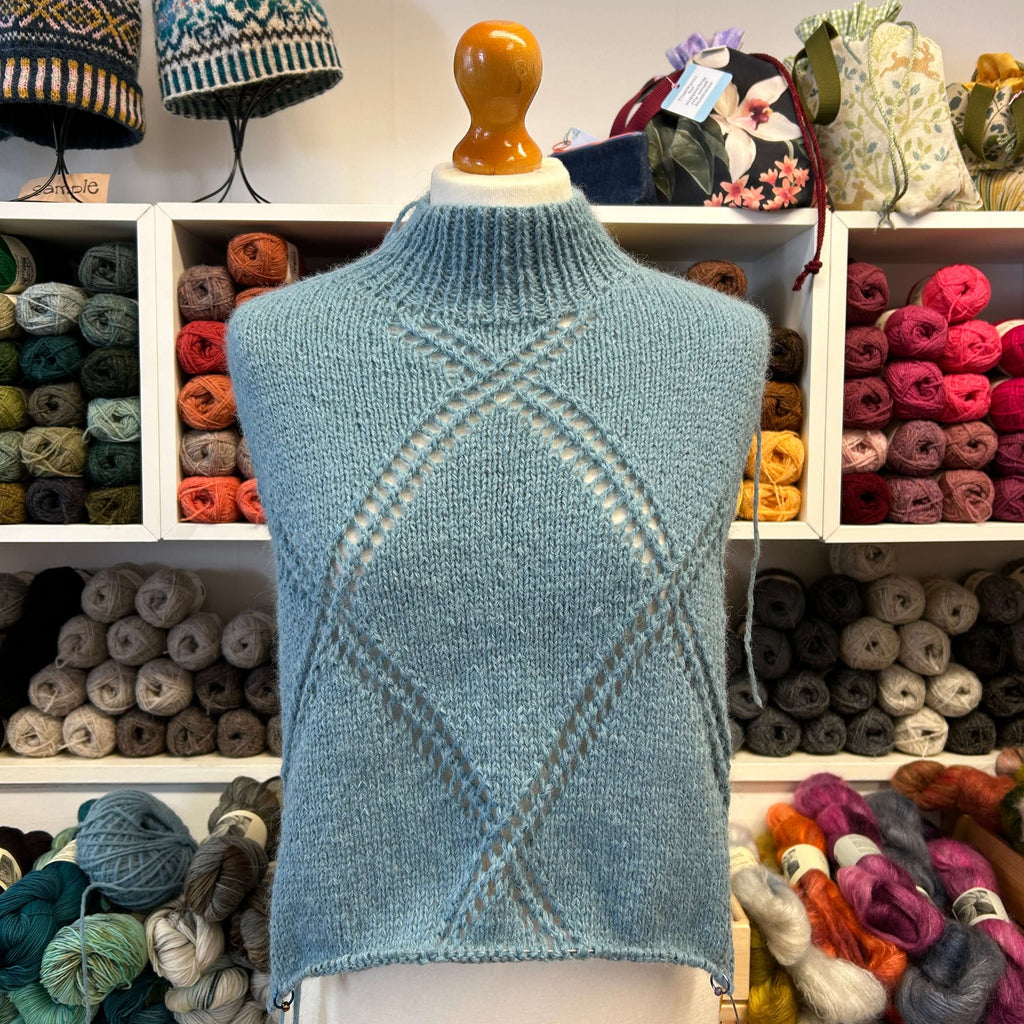
Student Vest (Front) 37" vest on 34" mannequin
I did manage to work on my Student Vest and knit another ball of the yarn, completing the back and front diamond section and moving on to the deep rib.
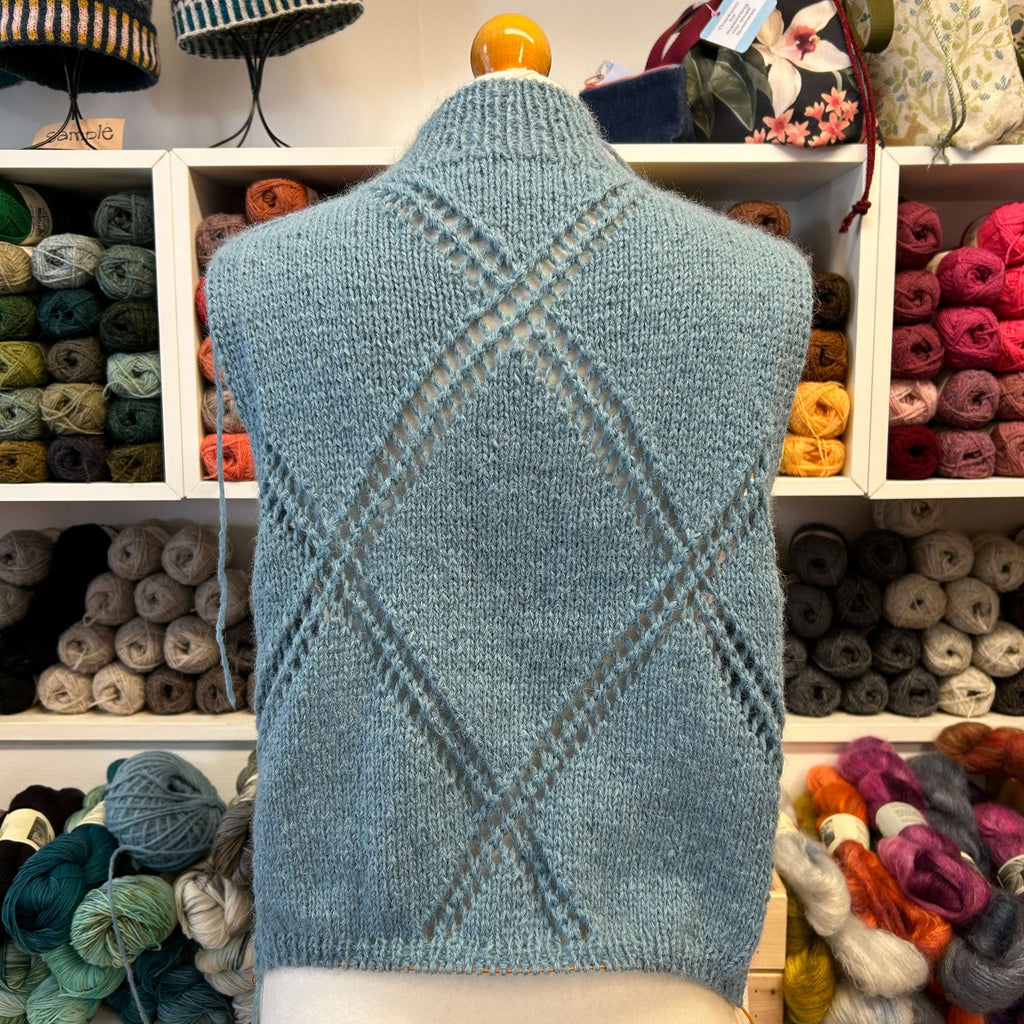 Student Vest (Back) 37" vest on 34" mannequin
Student Vest is a knitting pattern by Svetlana Volkova and available to buy on Ravelry.
I loved the simplicity of this - the argyle like diamond lace, the rib down the sides and the split hem.

I'm using Rico Luxury Alpaca Superfine in a new blue shade 027.
The pattern gives two options for the neck - tall or short. Both begin with a tubular cast on. This type of cast on gives a neat edge for ribbing. It looks like the rib rolls over without a beginning. It's a wee bit of a phaff but worth doing. I used the tutorial on Ysolda's website.
The neckline and back are shaped with short rows. The designer uses the simple wrap and turn method which is explained in the pattern. I find this video by Elizabeth Smith Knits to be very clear on how to resolve the wrapped stitches, especially picking up the wraps on the purl side.
It has a contiguous shoulder construction where your increase rapidly (increasing on both right and wrong side) until you get the shoulder width.

The body is worked back and forth.
The diamond pattern is charted only (it's a big A4 chart). I found I just needed to pay very close attention when the diamonds intersected otherwise the holes can wander.
If you do want to knit your own Student Vest I would advise reading the pattern all the way through. It's not difficult but it is perhaps so straightforward you may miss some info especially if you're not an experienced knitter.
Last month I said I was concerned about my tension as the vest didn't have the same oversized look as the pattern photos. I said I may block whilst unfinished to double check how much the yarn will relax when washed.
I have not. Instead, I'm still winging it. 😬 Now that I have the underarms done on both front and back I think it's sitting looser on the mannequin anyway. Hopefully.
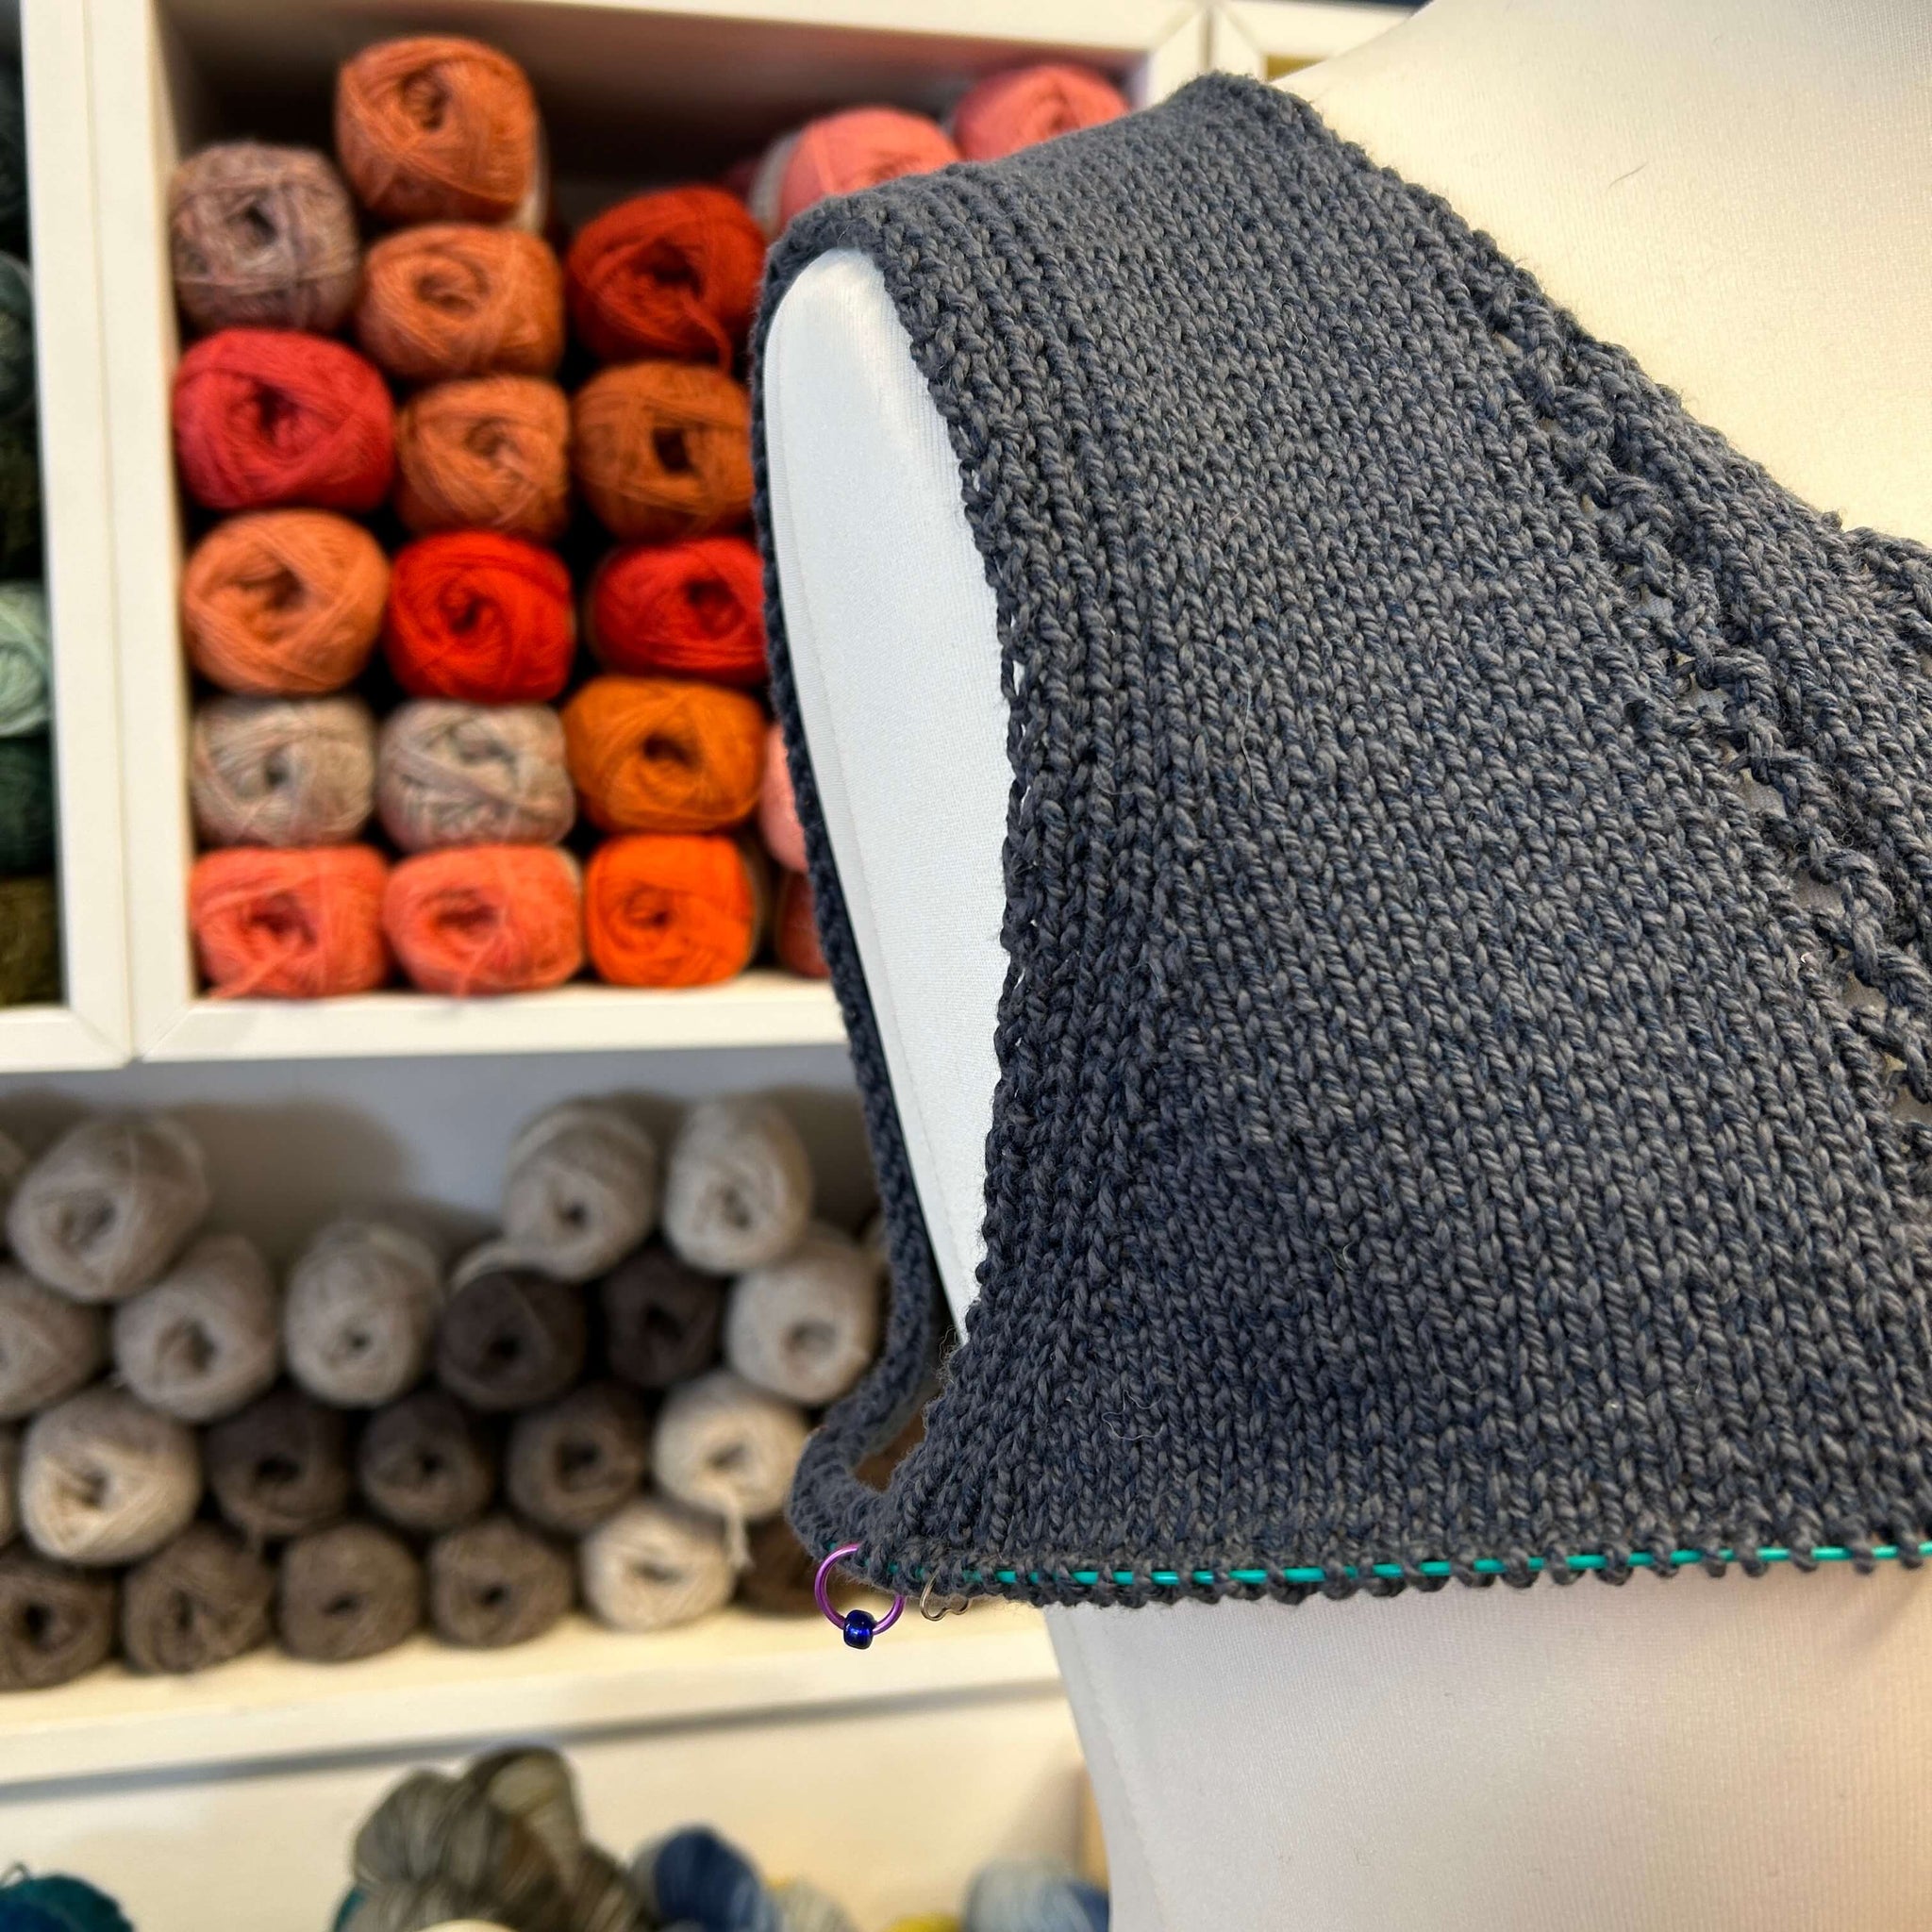
I haven't made as much progress on Student Vest as I could have as I've been distracted by another summery project - Riptide Slipover
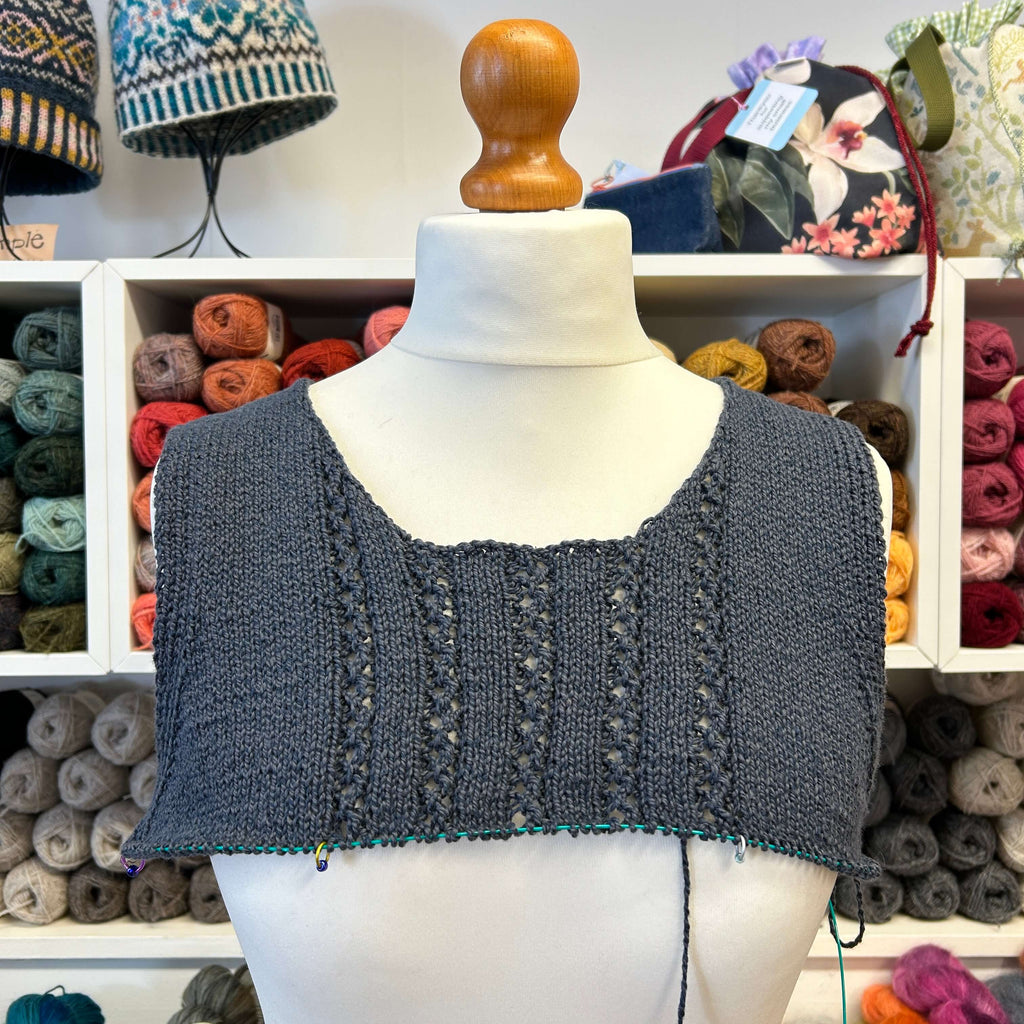
Riptide Slipover 39.5" finished size on 38" mannequin
Riptide Slipover by Jennifer Shiels Toland is available to buy on Ravelry, It was an impulse cast on after talking with Jacqueline in the shop. She had just knitted one and loved the seamless construction.
I'm using our brand new summer yarn - Rico Luxury Organic Cotton Silk. A blend of 77% organic cotton and 23% silk in a DK weight.
If you're not a fan of cotton (too hard, inelastic and unforgiving) then give this yarn a try. The silk really softens it up making it more pleasurable to work with and the very slight nubbly texture is much more forgiving to an inconsistent tension.
I already have a few other projects I'd like to make with this yarn. Top of the list a simple T-shirt and a classic scarflette or cowl.
But first! The Riptide Slipover.
This is knitted entirely seamlessly with lots of lovely detailing that's knitted as you go.
- You start with the upper back knitting down to after the back armhole shaping.
- Then you pick up stitches at the left shoulder and knit down to the left front neck edge.
- Then pick up stitches at the right shoulder and knit down to the right front neck edge.
- Then you join the left and right fronts and knit back and forth until you get to the end of the front armhole shaping.
- Then you join the front and back and you go round and round knitting the body.
There's a split hem after that but I've not read that far!
The lace pattern is very easy to work and is on the front and the back.
Things I love so far:
- The yarn.
- The armhole shaping and integrated finishing - a lovely squishy rib and slip stitch combo.
- The very very detailed instructions - the stitch markers are even numbered in the pattern! And you do use a lot of stitch markers.
The other project that's been hogging my attention this month is the Loop shawl/scarf designed by Casapinka on Ravelry. It's a semi circle shawl and I used our new Lang Alpaca Soxx in shade 05 and the undyed Angel Delightful.

Loop, unblocked
I had a false start last month when I turned the page on the pattern and realised I did not work the cast on correctly. But I did eventually get cast on successfully and despite the extra long rows I managed to finish this within 4 weeks.
I predicted last month that it was going to be AMAZING.
And it is.
The loop stitch is very easy to work and so effective in the highly variegated Alpaca Soxx.
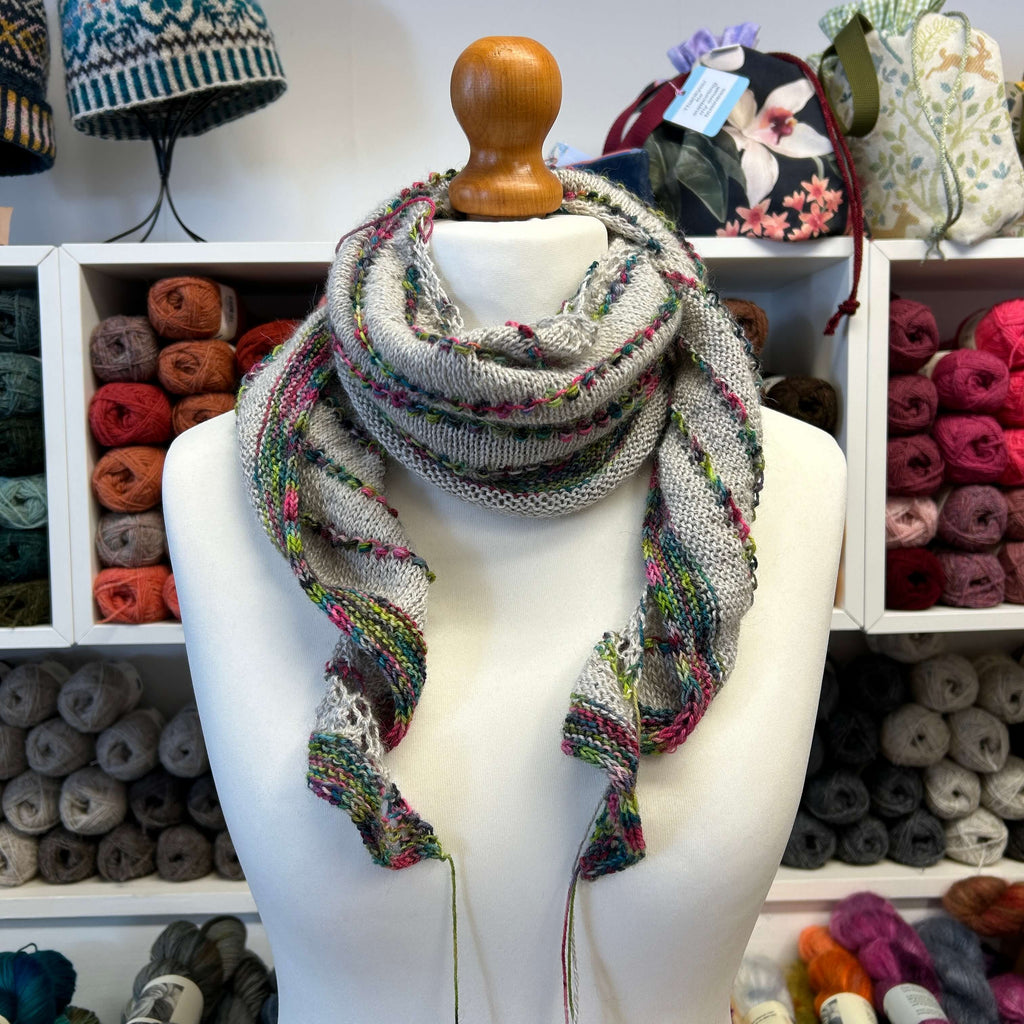
Loop (unblocked)
One piece of advice I'd give to anyone making it is to keep it LOOSE.
When working the edges and when working the loop stitch.
In fact, when working the edges I'd even advise knitters to add another YO in between the first two stitches and last two stitches of every right side row and then drop those YOs on the wrong side row.
It's a technique I used in our Striped Asymmetrical Shawl to keep the side edge from curling in.
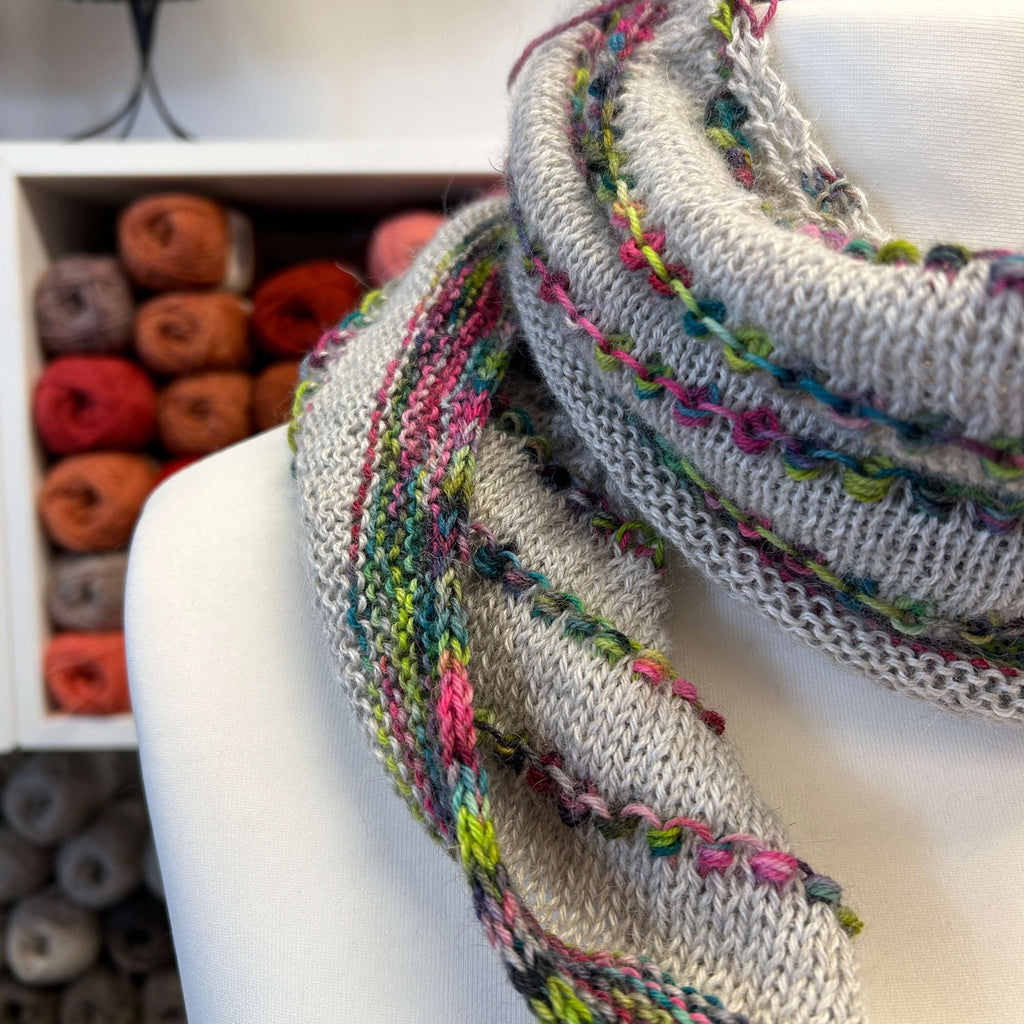 Loop (unblocked)
I haven't done that and I hope I don't regret it. I am a naturally loose knitter, so fingers crossed.
For Loop I now just need to wash and block and get it back on the mannequin for it's finished photos.
My next cast on is part of a longer term project - Operation Babywear.
(And yes I did first type that as Operation Baby which means something completely different. 😆)
Recently we've been shaking up our baby ranges with new yarns and patterns and I now want to add a whole new range of baby shop samples to match.
Last year we added King Cole Cutie Pie DK and Cherished 4ply as well as EMU Treasures Little Isle DK.
There's also been some delays to restocking our Rico Classic Baby DK so we're trying out King Cole Comfort DK. It's a similar synthetic fibre blend and it comes in a huge range of shades.
We're starting with 6 pastel shades and I've already earmarked 6 deeper pastel shades that we'll get next.
We also got the gorgeous Newborn Baby Knits Book 2 from King Cole.
So there's plenty of inspiration.
I decided to start with Cutie Pie DK in shade 5381 and I'm using pattern 6032 - a simple cross over cardigan with an interesting texture.
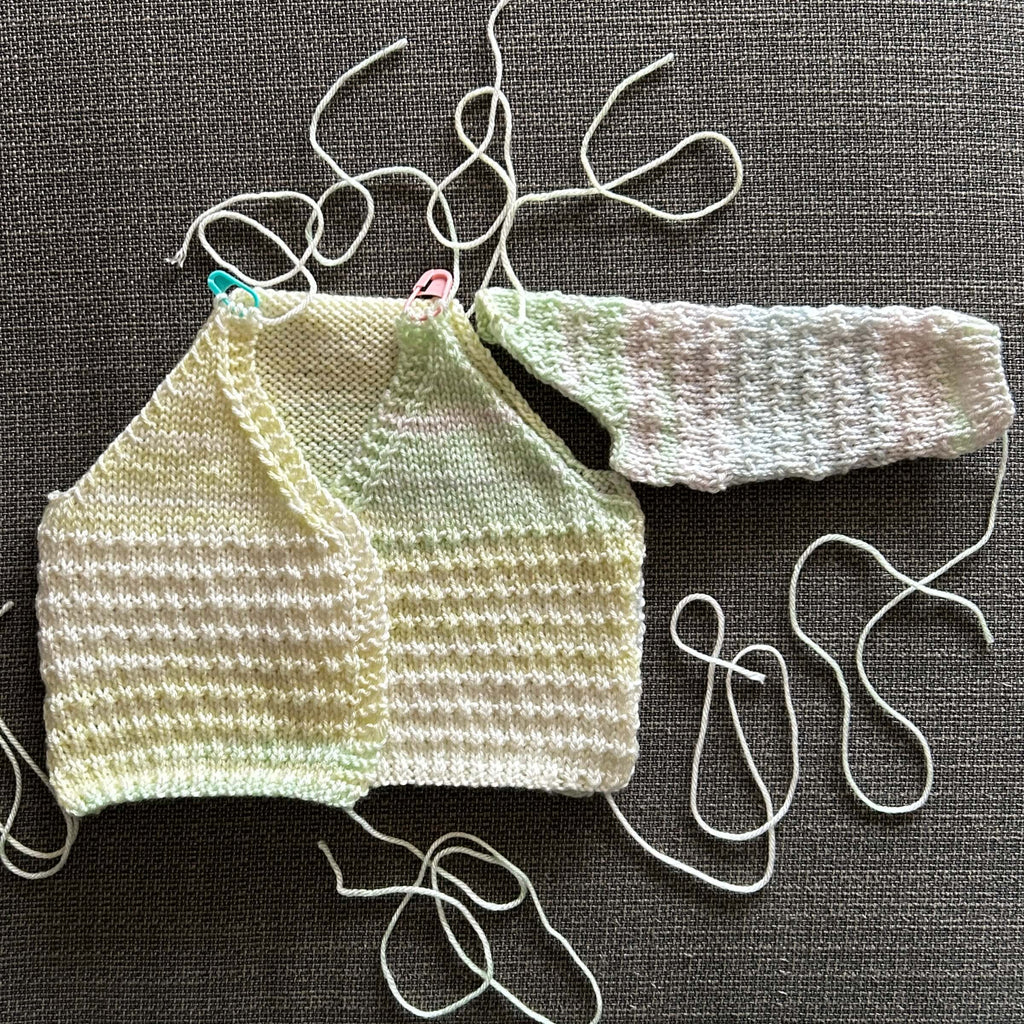
And yes it's knitted in bits, so it'll also sharpen my sewing up skills.😆
And one final project on the table... my Half Linen Stitch Cowl.
This is still growing... honest.
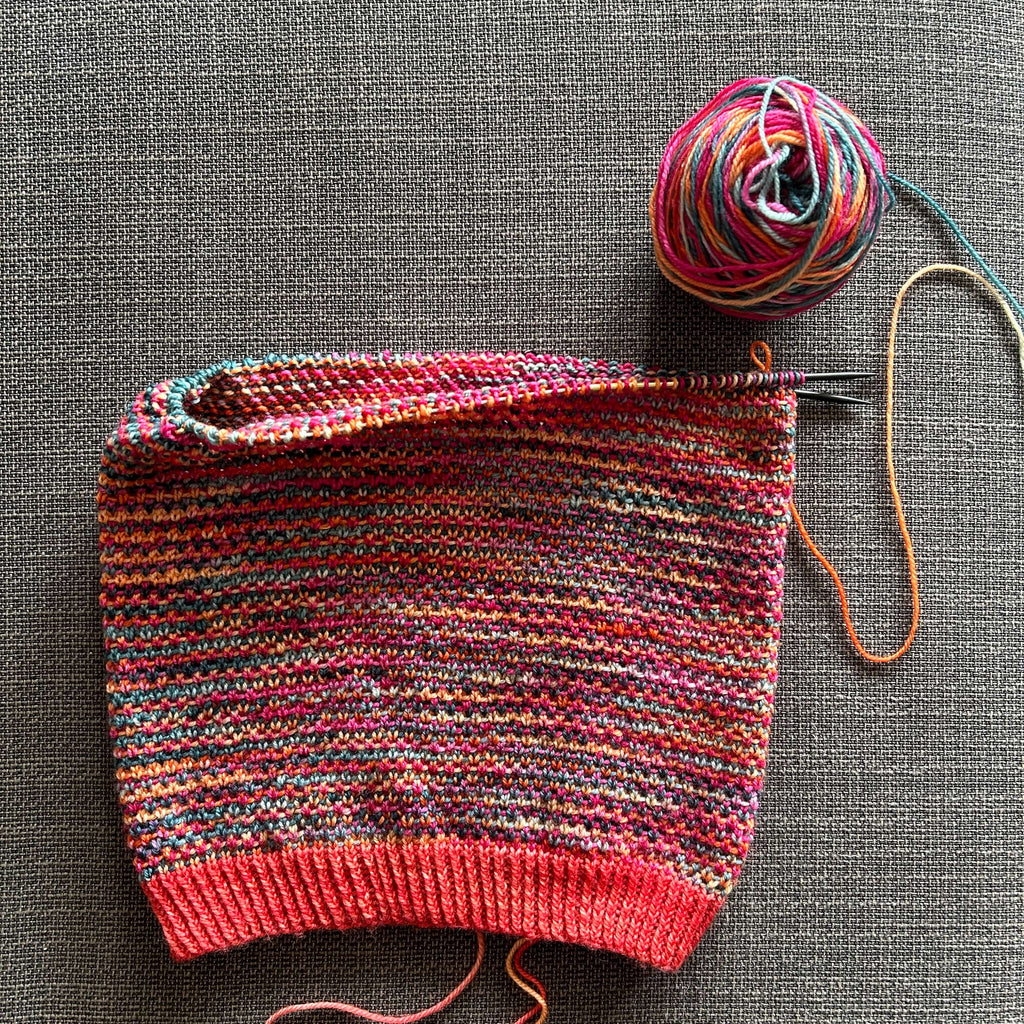
In fact I'm going to record here it's current length so I can check that it is actually growing when I do March's WiP update.😆
It is currently 24cm tall.
I'm using an Alegria Superpool Sock Set in Trapeze.
You get 100g of a variegated shade and 20g of a contrast. The colours come out quite striped on a small circumference like a sock but it looks very different in a slip stitch pattern, like linen stitch, as it produces a more blended effect with overlapping pops of contrasting colours.
This pattern is an adaption of our free Simple Cowl pattern. That pattern uses a 3mm x 40cm long circular needle and 160 stitches.
I'm knitting the rib with the contrast colour before switching to the big variegated hank.
I'm using a slightly thicker needle, 3.25mm, as slip stitches can produce a tighter, denser fabric. I am a loose knitter so if you knit tightly (or slip stitches tightly) I'd strongly suggest trying a 3.5mm instead. You don't want your fabric to pucker, but rather the slip stitches should sit flat across the fabric.
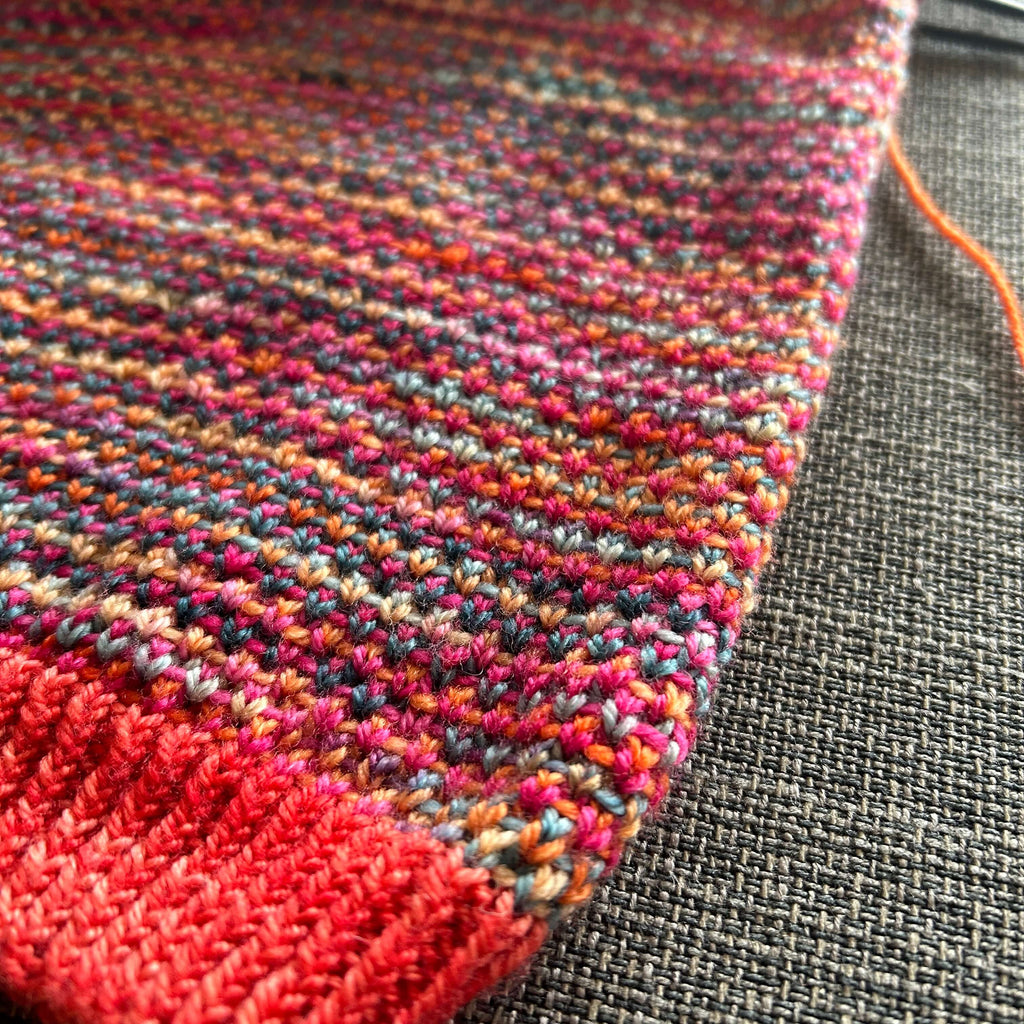
I'm doing a half linen stitch pattern which works up a bit faster as you just knit every other row.
Once I'm finished I'll write the pattern up and you'll be able to download it for free. This project is taking me a while so if you can't wait this is the half linen stitch pattern written out (worked over an even number or stitches).
Round 1: *knit 1, slip 1 purlwise with yarn at the front* repeat to end of round
Round 2: knit all stitches
Round 3: *slip 1 purlwise with yarn at the front, knit 1* repeat to end of round
Round 4: knit all stitches
One January goal I have not even attempted is the crochet cushion kit. Lots of people seemed keen on it so I will get on that ASAP!
And I also didn't manage anymore fish. Too distracted by lots of shiny new projects.

The fish are for a new shop window project that Sue and I are working on.
There's a thick pink knitted hanging scarf on one shop window currently and it's looking very bleached out. We're going to replace it with... FISH!
We're using our new super stripy Emu Helter Skelter DK in Splash and Sardine by Barbara Ceiga, available to buy on Ravelry. The fish are knitted seamlessly from the nose to the tail and you stuff as you go.
So. Grand plans for March. 😬
Get Loop blocked and in the shop.
Finish one more ball of yarn on Student vest.
Finish one baby sample (blocked and in the shop) and start another.
Finish at least half the body of the Riptide Slipover.
Finish another crochet cushion prototype.


